
-
How to Clean Your Garage Door
Like other home components, garage doors function best with regular cleaning and maintenance. In order to preserve beauty and functionality, homeowners are encouraged to wash their garage doors twice a year. In addition to better appearance and functionality, many warranties require doors to be cleaned and maintained regularly. Below are some strategies to safely and effectively clean your garage door.
Preparing for a Wash
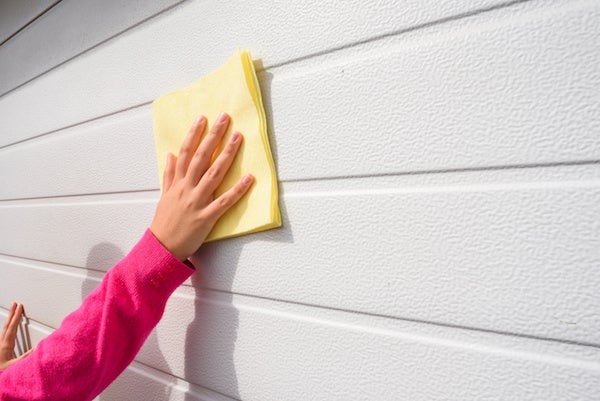
Begin the process by removing dirt chunks with a dry cloth. This will minimize the amount of work required when the door is wet. Once visible dirt is removed, wet the inside and outside of the door with a hose. Using a gentle sprayer on the door will ensure the finish remains undisturbed. Prepare for the next step by gathering soft rags or a sponge. As with the gentle sprayer, non-abrasive rags will help maintain the beauty of the door for the maximum number of years.
Washing the Door
Using a cleaning bucket, mix water and a gentle cleaner. Car wash soap and dish soap are commonly used. Many homeowners clean the interior of the door then move to the outside. With a soft rag or sponge, begin washing the door with the soapy water, including the weatherstripping. Once dirt and grime are removed from all areas, gently rinse off the soapy water using a hose. Bleach water can be used on non-wood doors to treat problem areas. Rinse the bucket, rags, and door thoroughly before using bleach water.
Finishing the Process
After the door is satisfactorily clean, allow it to dry completely. Similar to the car washing process, the cleaning of garage doors should end with a wax finish. For wood doors, a wood finish is to be used in place of wax. If there are any places on the wood door where the existing finish is worn or absent, correct this (often with primer) before applying the new coat of finish. For non-wood doors, a liquid car wax is commonly used. As the wood finish or wax dries, cover all exposed parts of the door, which includes the interior and exterior of the bottom piece.
Maintaining a clean garage door can amplify the beauty of a home. Performing a twice-yearly washing and waxing will, in many cases, fulfill the warranty requirements set by the manufacturer. For the owner, regular cleaning will save money by minimizing repairs, lengthening the door’s lifespan, and, often, maintaining the manufacturer warranty. The steps above outline an effective approach to augment the appearance and functionality of garage doors.
For more information about maintaining your garage door, visit the Thomas V. Giel Garage Doors, Inc. blog.
-
A Guide to Changing Your Garage Door Remote Batteries
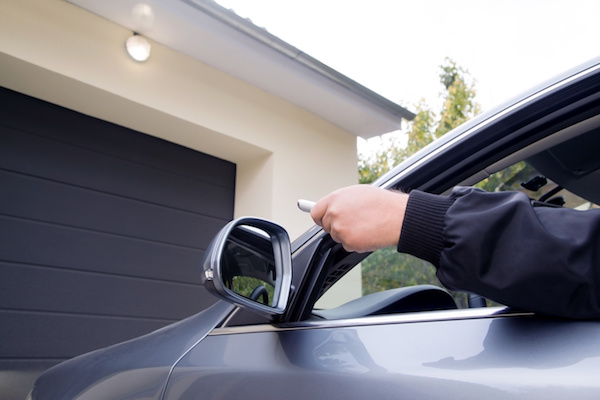
Man by using remote garage opens in a cloudy day
From the outside, garage doors are typically opened using either a keypad or remote. The remote is an especially convenient way to open the garage door while remaining in the vehicle. Over time, remote openers may begin to require several presses in order to open the door. In such instances, the solution may be as simple as replacing the battery. Below are three simple steps for changing your garage door remote batteries.
Step 1: Remove the Battery Cover
On many remote garage door openers, the battery cover is often located on the back of the device. In this case, the cover may be opened by pressing the back piece of the device and sliding it back. Other remotes have covers with no discernable battery covers. These can usually be opened by splitting the remote into two pieces. A small screwdriver will assist with battery covers attached with a screw.
Step 2: Identify the Battery Type and Obtain a Replacement
Remove the battery from the remote. Most may easily be pulled or popped out of the remote. Many remote batteries are small, round, silver in color, and flat on the top and bottom. Such batteries come in specific sizes. The battery will have the type and size identified on the side as a series of numbers. A safe option is to simply take the exhausted battery to a store where the staff will provide the appropriate replacement.
Step 3: Replace and Reprogram
Place the replacement battery or batteries in the remote, facing them in the correct direction as indicated on the remote. Replace the cover using the reverse process which was used to remove it. Once the battery has been replaced, the remote may need to be reprogrammed to operate correctly with the garage door. The manufacturer of the remote provides instructions for reprogramming, which can be accessed online.
Garage door remote openers can often be rejuvenated by inserting a new battery or batteries. This process can be accomplished by removing the cover, replacing the battery, and reprogramming the remote. Following these steps as listed above, batteries can be replaced quickly and easily, allowing the user to enjoy the remote as it is designed to function: consistently opening the garage door on the first attempt.
For more information about how to maintain your garage door and opener, visit the Thomas V. Giel Garage Doors, Inc. blog.